Where The Rubber Hits The … errr…. Acrylic Block! A Tutorial
Better late than never…. I DID tell you I was working on a tutorial last week… 🙂
As I type this, I am relishing in the sound of plaster being sawed off the walls and am giddy with excitement to hear the sound of the saw riiiiiiiiiiippppppppppppppppping through the nasty acrylic bathtub and surround that currently makes up my master bath “oasis”. Hehe! We are waiting for the floor trip and stair bullnose to show up so that we can continue on with the woodfloor install. With any luck it should be here the first of next week and then the BIG mess begins. Once all the floors are in I can start REALLY sorting out my stuff and rebuilding my space. (Plus, B will might have time to build my new piece o’ furniture for the studio…. eventually.. lol!)
*Deep Breath*
For the longest time I simply could not get off the “clear acrylic stamps only” wagon… I LOVE clear acrylic stamps! I love being able to see exactly where I stamp on my artwork and not have to get a “crick” in my neck laying my head down on the desk trying to line up a stamp.
I have found some marvelous stamped images that are manufactured in red rubber and have been “hohumming” about buying them because I really just don’t like using wooden blocks and/or not being able to “see” where I am stamping… SO…. I peeked around on the web and saw this idea and decided to try it out.
I have seen the light! My eyes have been opened to a whole new RED {& grey} world !!! It works for me, so I thought I’d share it with you. I snapped these photos AGES ago, right before “The Great Flood”, which explains the InkStak in the background. 🙂 So without further rambling….
Where The Rubber Hits The …. errr….. Acrylic Block!
 You will need:
* A sheet of uncut rubber images
* Sharp pair of scissors
* EZ Mount foam stuff
* StazOn ink {& cleaner}
* Scrap paper
The rubber stamps that I am showing in this tutorial are from Missy B Designs. Missy is the daughter of a friend of mine and has some way cute {and way *snort* cheeky} designs. *All stamp images in this tutorial are Copyright Missy B Designs.
Step 1:
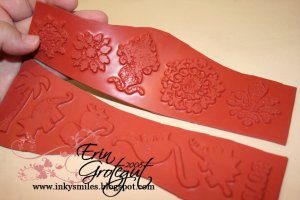
First things first, this red rubber stuff comes in a sheet that is flimsy and floppy {and a bit stinky, too}… it helps to do a rough cut around the images for easier handling. Onward and upward….

The REAL Step 1:
Once you have a manageable piece of rubber stamp to work with, cut a little closer to the images and trim them up how you like your stamps. I try to trim mine with nice sharp solid edges as close to the image as possible so that I have limited “oops” stamping areas on the rubber. Toss out the scraps.
Step 2:
There is a {really, extremely, horribly) sticky side of the EZ Mount Foam stuff and there is a “static” side. For this step, you need to determine which side is the sticky side.
(DO NOT PEEL OFF THE PROTECTIVE PAPER YET (please, cuz you will regret it, I promise… see it totally pulling at my skin? It’s not worth the hassle, leave the paper on… ok… moving on.. hehe…)
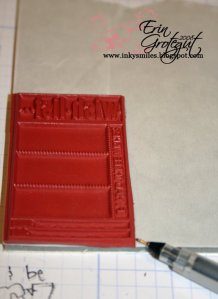
Step 4:
Place your stamp image with the IMAGE side facing UP and the flat side (back) facing DOWN on the EZ Mount Foam and trace it out with a Sharpie marker.
Step 5:
Cut the image out of the EZ Mount Foam with sharp scissors. You will most likely need to clean them with an anti gunk cleaner. It’s some nasty sticky stuff!
Steps 6, 7, & 8:
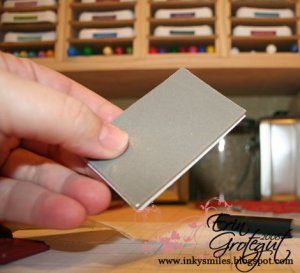
Peel the paper off of the STATIC side of the EZ Mount Foam and lay STATIC side UP on the workspace.
Ink up the stamp with black StazOn ink, careful not to get ink on the edges {or your fingers – Black Finger Club here we come….}
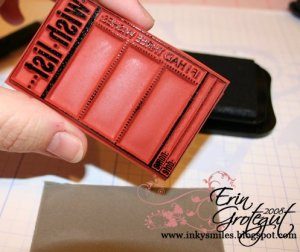
GENTLY press the image onto the STATIC side of the EZ Mount Foam. Place it on the EZ Mount EXACTLY to fit how it was cut out. Let the ink dry for a few minutes or you will end up a member of the Black Finger Club.
Step 9:
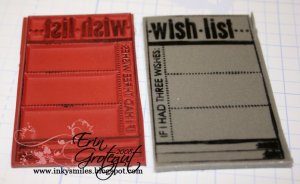
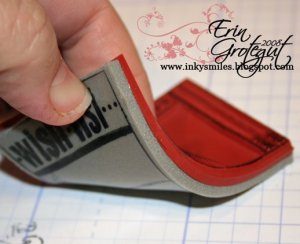
Remove the paper from the sticky side and adhere the rubber stamp, image side UP. See pics below. You should be able to see images on both sides of the stamp.
That’s it! Now you have an image that you will be able to see AND line up through the clear acrylic block. If you’re careful about making sure all your edges match you will be able to get a nice lined up image even without being able to see through to the paper.
This what you will end up with. You can see in the first photo why I know about the Black Finger Club…
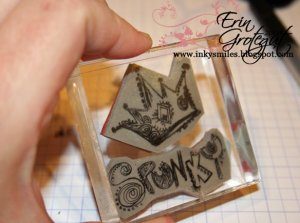
EDITED: if it’s not a square stamp (above far right picture), cut out as close to the image as possible using nice straight lines and just sort of cut around the image. It helps to match up the image to the EZ Mount if you cut in a way that it can only match up one way. (See the crown?)
Also, I have not noticed that the ink inhibits clinging to the block.




18 thoughts on “Where The Rubber Hits The … errr…. Acrylic Block! A Tutorial”
Great tut! Almost makes me want to go out and get a bunch of not clear stamps!! hmmmm halloween is comming up! Need meaux stamps!lol
tut Erin – this was an “aha” moment for me – why don’t I ever think to do that LOL!Now what about if it isn’t a square stamp? hmmmmm
ok, stamping the image on the cling side was pure genius! You rock!Hugs,Yvonne
Well duh, why have I never thought to stamp the image on the foam? LOL! Have you noticed if it makes any difference in its cling-ability? Great tips!
OK…this is one of those DAAAA moments!! Thanks for the tip!! I will be doing this from now on!! 🙂
OK…this is one of those DAAAA moments!! Thanks for the tip!! I will be doing this from now on!! 🙂
A really great tutorial Erin! TFS
Awesome tutorial!! I also have never thought to stamp on the cling – it totally solves the “where the heck am I stamping” problem. I also wanted to mention that if your trimming is less than spectacular and you find that it’s leaving those cool unwanted edges and what not, then you can always retrim with the foam intact. It’s so handy…because I’m a less than spetacular trimmer.
You just might have enticed me to move beyond only clear stamps!Great Tutorial! And why didn’t I think of that?Ü
WOW what an AWESOME idea but you are a little late!! I just finished this summer making ALL my rubber wooded mounted stamps now ready for arcyllic blocks. I dont see where I could do this after the fact but will remember this for any NEW stamp sets that I get.
Thank you so much for the tutorial! I too am such a freak about clear stamps, but no longer!
inka dinkadie..that is so cool..U R one clever chick!!
That’s too slick for me! Sincerely,Sonja
Ok….so why didn’t you tell me about this before I remounted all umpteen thousand of my rubber stamps onto EZ Mount this summer? Since you didn’t tell me before I remounted everything, you’ll have to come up with a way to stamp on them once they’re already mounted! LOL!
Oh my Gosh! You friend Sue C. pointed me in your direction. This is amazing. You are my Hero! I just have to take all of the red foam off of my rubber and do this. (Could take a year or two.) Revolutionary! Thank you SO much for sharing all of the steps and your pointers. Can’t wait! :O)
Brilliant!!! TFS this w-a-y kewl idea!
duh. why in the world didn’t I think of this before?!
Acrylic is definitely one of the more durable materials we have in the market these days and that's why acrylic bathtubs were made.