To Infinity & Beyond….
Sorry, couldn’t resist.
The Infinity Board
I saw this online at Gina K’s Stamp TV site. Click anywhere on this line for instrux.
{Edited for Clarification} This Infinity Board is a homemade “Infinity Board” (cased from REAL Infinity Board) . You can use this as a “backdrop” for photos of cards and other smaller projects. It’s great for photographing small items for your blog or etsy and ebay type stores. You will still need some good lighting for your photographs. The IB provides a back ground of “white infinity”. The curved paper prevents sharp corners or creases in your photograph (unless you accidentally crease your paper like I did and need to put a new one on).
I had to make one. So today I ran out to WMart to find the parts to make it. I couldn’t find the sketch paper so I subbed poster board which I had to cut down.
It was super easy to prepare and assemble and I think it took maybe 10 minutes once I located my Incredibly Tacky Tape and Fiskars Fingertip knife. The other adjustment I made was to put some little “tabs” on the bottom side so that the end of the poster board would slip into it and make a deeper well for larger projects. I love it so far, but I think I need to get a piece of poster board that is not shiny… back to WMart tomorrow….

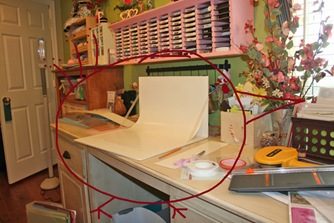
The finished project. Don’t mind the mess everywhere around it… I just shoved stuff out of the way cuz I was excited to “build” something. LOL!
I used a piece of the poster board that I had cut off to line up the corner to a proper 90* angle. {cuz ya know, I couldn’t be bothered to open the big messy drawer to find the protractor… lol…} When I tuck the end of the posterboard in the tabs, the curve becomes sharper and there’s more room on the board for objects.

Here’s a “close up” of the tabs I adhered to the bottom to hold the poster board in place. I hope you can see it… click on the photo, it might help. I taped just the bottom half of the tab, then stuck it down on the foam board.
Here’s the REAL Infinity Board (click REAL) that Gina K’s people totally cased…. Gina K’s people’s option… much cheaper! (Poster board – $1.97, Foam board – $2.58, other materials on hand… Elbow Grease – $0.00)
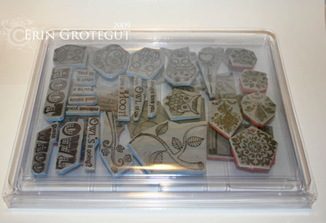
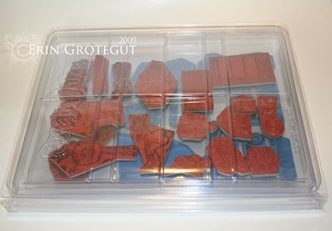
And here we have a couple of examples of photos… I cleaned up my studio a little this morning and put away some of the odds and ends of stuff from projects I’ve been working on. I put away some loose, unmounted stamps and a whole boatload of beads and baubles. There’s a whole ‘nother ScrapONizer full of beads in baggies.
These photos of the card were snapped without any decent lighting. I just flipped on my studio lights and snapped a couple of quick photos for clarification.
How you set up your shot.
Close ups (bad lighting and edited only to add the watermark), but you get the general idea. Please ignore the crease on the left. I creased it accidentally when moving the board last night. UGH. Back to Wmart…
Hope that clears it up!
These fabulous little ScrapONizer organizers can be purchased at Stamper Storage. If you’d like to purchase multiples (2 or more sets) of the ScrapONizer large Organizer Sets shoot me an email and I will prepare a discount for you!

Above photo shows ScrapONizer 2 compartment divider and 8 SnapLock Minis (purchased separately).
The above two photos shows loose unmounted stamps stored in a ScrapONizer on two 8.5×11 folders (purchased separately).
I’m off to the showers and then to the “big city” of Provo to meet a girlfriend for dinner. (She’s here visiting from the great northwest.)
Inky Smiles!


12 thoughts on “To Infinity & Beyond….”
I don't really get it…is it made to use for photos? I love your skater guy though, lol.
Hey Sparks – I edited for clarification. Be sure to visit the GIna K link for more info on lighting and the IB and schtuff.
Can I just confide that I don't scrap (though I DO like making greeting cards/stamping when/if I have time) BUT I HAVE TO HAVE ONE OF THESE.
This is SO cool. I have wondered how so many shots on blogs get that clean look on their pictures when they display stuff and this must be it. I've tried taking photos of stuff but the background is always dumb and I end up not putting the pic on my blog. I'm making one of these!!! I don't know what I'll feature, but whatever it is will look GREAT with the clean backdrop. Thank you!!!
Cool! I'm glad you were able to make one and it works great, judging from your pics.
Thanks for sharing!
Oh a a great idea! I need to create one of these for taking photo's of my projects! Hope your dinner was fabulous!
I wish I'd seen that idea before buying the photo cube thing I have, which works fine but is too small for a lot of stuff. You did a great job! TFS. Hope your weekend is awesome!
Oh cool! I'm gonna have to try that!! Thanks for the idea and the know how!!
I learn so much from you and your blog thanks!
ERIN!!!!
I LOVE it!!
You KNOW I have my board upstairs in my 'room' WAITING to be done. I FAILED the challenge….miserably!! I'm going to get started on dinner for tonight, NOW, so I can get IN my 'room' today and post SOMETHING!!!
BTW-I LOVE, LOVE, LOVE the card you made!!! I may even 'borrow' the sketch!! 🙂
THANK YOU for being you!!!!
Smiles to you my friend!
Wow – thank s for the how too – I need to do this – my layout photos stink if I can't take them outside!
Erin, LOVE – LOVE – LOVE this idea and it works wonderful!! I've been referring people to your post. Hope you don't mind.
How awesome! Thanks for sharing, I'll be whipping one up shortly!