Ladder Scarf Tutorial
Hello again!
This post is a follow up to yesterday’s Frozen Scarf post. I figured with all the photos it would be better to split it into two posts and keep the tutorial separate.
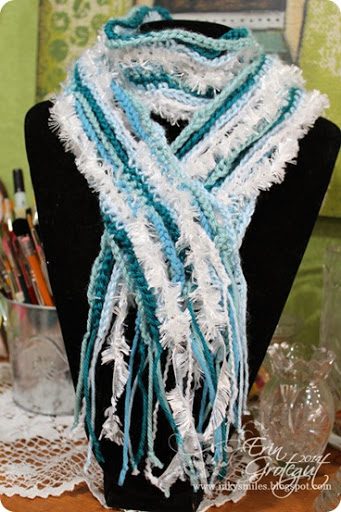
This is the scarf I shared yesterday:
Today I am going to give you a very basic tutorial to make this scarf.
Disclaimer: I have never written a pattern/instructions for crocheted ANYTHING… but this is so ridiculously easy that I don’t think I can mess it up too badly 🙂 I am writing this for a scarf for an adult… shorten as needed per size of the wee one.
LADDER SCARF PATTERN/INSTRUCTIONS:
This scarf is perfect for using up ends of skeins of yarn and misc scraps of yarn. Mix the colors and textures up as you choose.
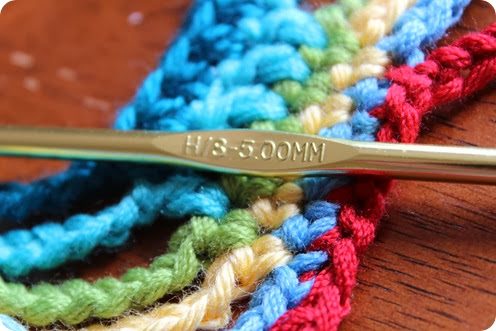
Hook size used for this project is a size “H/8-5.00 mm”
Step One:
– Start first color with a long tail, roughly 7”
– Chain 315 stitches.
– End with a 7” tail.
Step Two:
– Start second color in the same manner, leave a 7” tail.
– Chain 15
– *Count 15 stitches on the first chain and find stitch #16.
– Once you have found chain #16 single crochet with your second color (this will be stitch #16 on your second color) for the next FIVE stitches You will have connected your two colors to each other with FIVE single crochets.
– Chain 15 more stitches.
– Repeat from * until you reach the end. You should have 15 chained stitches at the ends with a 7” tail string.Steps Three – Eleven (Or however wide you want to make it):
– Continue this process until you have reached the desired width of scarf. My Frozen scarf was 11 rows wide.Finishing:
– Trim your tails to all the same length. I tied knots in the ends to prevent fraying.NOTE: If you want more space between each row of the scarf you can do five double crochets or five half double crochets instead of five single crochets. This will give just a bit more spacing between the rows.
Here are the instructions in photo format.
(I have only crocheted a short length to illustrate the process.)
Find your size H/8 –5.00 mm hook
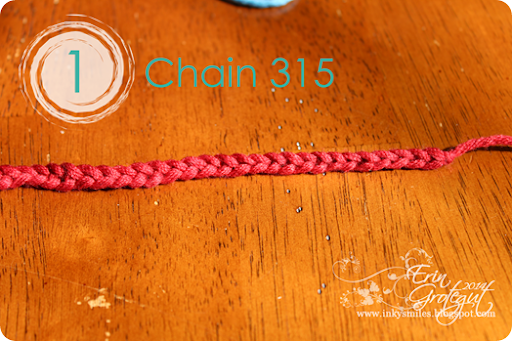
Step One:
– Start first color with a long tail, roughly 7”
– Chain 315 stitches.
– End with a 7” tail.
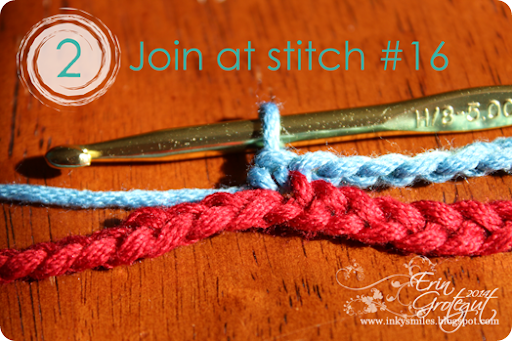
Step Two:
– Start second color in the same manner, leave a 7” tail.
– Chain 15
– *Count 15 stitches on the first chain and find stitch #16.
– Once you have found chain #16 join your colors with a single crochet (this will be stitch #16 on your second color) for the next five stitches You will have connected your two colors to each other with FIVE single crochets.
– Chain 15 more stitches.
– Repeat from * until you reach the end. You should have 15 chained stitches at the end with a 7” tail string.
Steps Three – Eleven (Or however wide you want to make it):
– Continue this process until you have reached the desired width of scarf.
NOTE: If you want more space between each row of the scarf you can do five double crochets or five half double crochets instead of five single crochets. This will give just a bit more spacing between the rows. {I believe in the original pattern, the artist used double crochet (posts) for her scarf. }
AND THAT IS IT!
And that’s it… easy peasy, especially once you’ve attached the second row/color. You only have to count the 15 chain stitches and can zip right through the scarf.
Here’s a peek at the chunky yarn scarf I made to test the pattern. Chunky yarn crocheting achieves length very quickly with fewer stitches. I think the length on this one is 150-ish stitches and the spacing is 10 chains, 5 single crochet.
Thanks for popping in. If you decide to crochet this scarf I would LOVE to see it 🙂 Link up in the comments. (Miss Jeanne, I sure hope to see one or two made for your girls .. hehe..)
Inky Smiles!
~Erin


