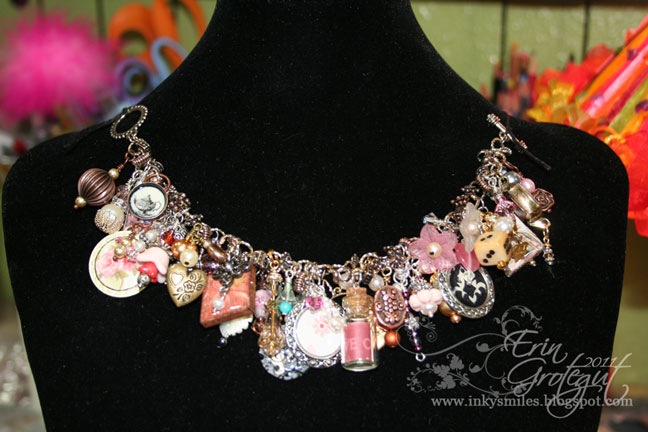
Charmed, I’m Sure! A C.U. Recap – The Charm Swap
I’m back with some photos of our Charm Swap from this year’s Creative University. This year Tresa asked me to be the “Charm Mistress”/head Charm Fairy and organize and carry out the swap. This year we did TWO separate and completely different charm swaps!! It was a TON of work and a TON of fun! I created a Charm School and our Charm Guidelines and posted them on our old CU students site. Rather than me retype and post pics of the whole shabang how about you just click on over and check it out and then finish reading this blog post? Click HERE to view the Charm Swap goodness. A separate window will open up and you can click on the tabs to read all about it and visit my Charm School!
My charm fairies were AMAZING at helping me sort all of the GORGEOUS charms that my Charming Ladies turned in. I was truly amazed at the creativity and love that filled this charm swap. Many of the ladies were beginners but you would never know it from the fabulous charms they contributed. One of our Charming Ladies had to step out of the swap due to a death in her family but another Charming Lady contacted me privately and arranged to create both her own and our friend’s charms for BOTH swaps so that our friend could receive some charms back and a bit of happiness in an otherwise sad time. You see, crafty ladies stick together and help each other out. It’s amazing. I love it.
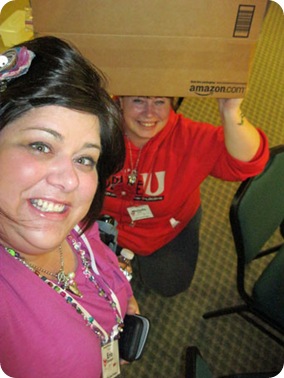
My sweet friend, Michelle, helped carry over the big honkin box of bags of charms to our “secret hide-a-way” where we swapped out the charms. Here she is under the weight of all those crazy charms… and me getting in on the shot.. haha!
What a couple of goofballs!
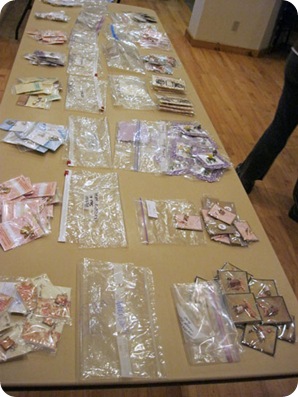
Here are my darling charm fairies sorting out the swaps. We did a “round robin” style swap and it worked out GREAT! We had two tables full of Vintage Victorian charms and one and a half tables full of Under the Sea charms.
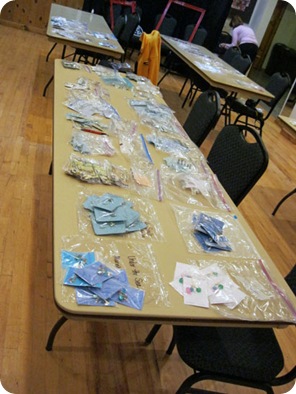
I had originally taken pictures of each individual charm but then I decided I did not want to edit each individual charm so here I’ve grouped them on my grubby Fiskars craft mat (sorry for it’s ugliness) and snapped photos of the charms in groups. I figured this would be faster and easier for me and I’d actually be able to get a post up!
Charm Swap #1 – Vintage Victorian
Theme Guidelines:
“I wandered lonely as a cloud
That floats on high o’er vales and hills,
When all at once I saw a crowd,
A host, of golden daffodils…”
~ WadsworthHave you ever rummaged through grandma’s jewelry box or jeweled treasures at a flea market? Find joy in the beauty of old, well loved and worn baubles and trinkets, sheet music, lacey metals, flowers, gears, and magical beauty.
Colors are soft and muted, pastels, pearls, etc.Party with antique colored, aged and patina’d metals (not bright and shiny) in this charm party. Think OLD!
Here are the charms that I received in my bag. I forgot to write names on these pics but I will write who they were from under the pics.
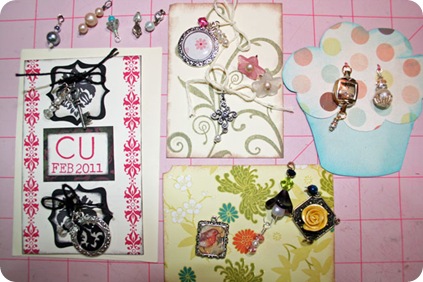
{top loose beads-miscellaneous from a couple of ppl, red and black-Bobie G., pink n silver – also Bobie G, the flowers on the card – Michelle J, cupcake card – Melody P, loose charms on the greenish card – Linda S, the green card charms – Kari S}

{red square – Nichole L, silver and black – Yvonne H, pendant circle on striped paper – Kandi G, rose circle – Tahne T, bottle charm – Charlene W, teapot pendant – Kim G}

{crystal angel –Kathie D, dice and hearts – Marieke H, heart and baubles – Marieke H, porcelain flowers – Wendi H}
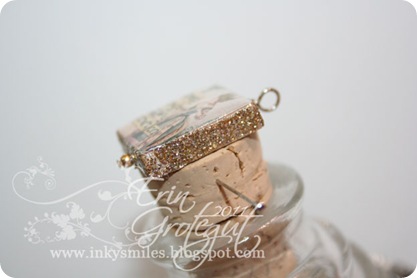
Here is my main Vintage Victorian Charm. I failed to take a photo of my filler charm. My charm is created from a scrabble tile which I raided from our scrabble game and drilled top to bottom with Brent’s Dremel tool (gotta love raiding the woodshop for craft projects). I made a digital design in PSE and then shrunk it down to fit a scrabble tile and printed it out onto cardstock and covered in mod podged on both sides.
![KeepCalmCraftOnCharmImgWeb[10] KeepCalmCraftOnCharmImgWeb[10]](https://www.mycreativeescape.com/wp-content/uploads/a7922-keepcalmcraftoncharmimgweb5b105d_thumb.jpg?imgmax=800)
I covered the edges of the tiles with crystal effects and then dipped them into Martha Stewart antique silver glitter and let everything dry overnight. The next day I adhered the images to the tiles using crystal effects and then poured resin over them and let them sit for several days. When they were good and cured I finished them up with silver headpins and silver beads which I “antiqued” with a brown Copic marker.

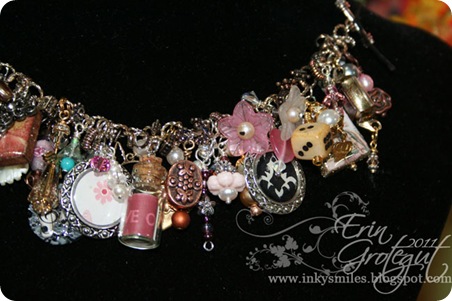
And here they are assembled on the charm bracelet that I made. I made the bracelet base out of twisted jump rings and silver baubles filled with swarovski crystalss. I used liver of sulpher to antique the metal base parts. It was stinky but easy peasy and I love the end result.
Charm Swap #2 – Under The Sea
Theme Guidelines:
“The seaweed is always greener
in somebody else’s lake..”
~ The Little MermaidJourney through mystical seas with beads and baubles of blues, greens, purple and silvery tones.
Anything mystical shiny and shimmery goes! Mermaids and fishies swim amongst the glittery stones and shells in our underwater charm garden.
Party with pearls, shimmery shells, crystals, glass beads, silver (colored) and antique silver metals.
Here are the charms that I received in my bag of underwater loveliness. I did remember to write the names of each artist on the cards with the charms. Whew!
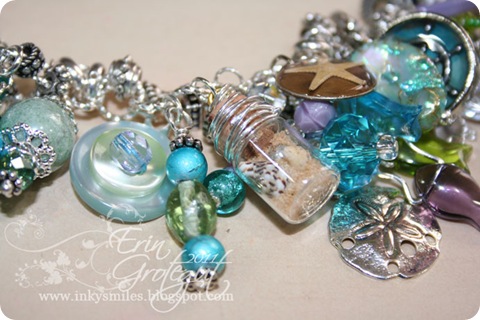
And here are my Under the Sea charms. My main charm is created from a tiny glass bottle which I filled with sand and a touch of magic glitter and some teeeny tiny seashells and pearls and wrapped with silver wire cuz they looked a little “naked” and needed something else. Forget a message in a bottle I want some bling in a bottle! Yah baby! My “filler” charm is just a simple shell bead from Michael’s.
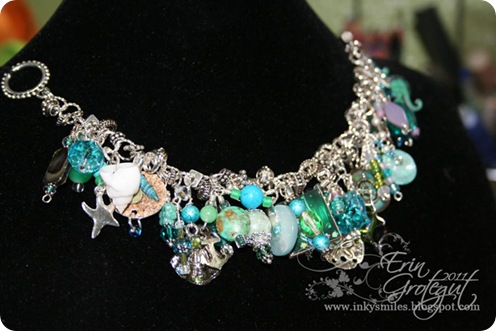
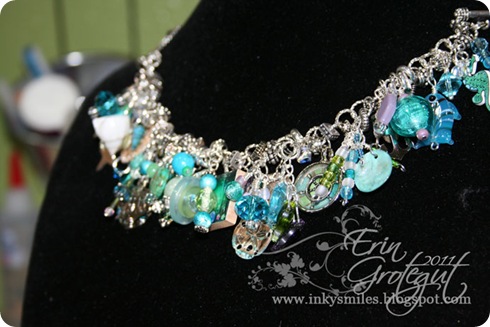
Here are all of the Under The Sea charms on a bright silver bracelet that I made from the same twisted jump rings and baubles as I did for the Vintage bracelet base. I forgot to attach my own charm to it, lol, so I have it attached in a pic at the end.
I LOVED both of these swaps and I am totally head over heels in love with both of my bracelets. I have worn the Vintage bracelet several times and have received loads of compliments on it and it’s quite the conversation piece. I can’t wait to start wearing the Under The Sea bracelet now that I’ve got it all assembled! It’s sure to be a great conversation starter!
Thanks for hanging in there with me on this SUPER long post! Hope you feel inspired to make yourself a little blingity bling. All of the artists in these swaps did such an amazing job!
Inky & Blingy Smiles!







10 thoughts on “Charmed, I’m Sure! A C.U. Recap – The Charm Swap”
WOWZA! The charms look fantabulous! I so wish I could have made the trip this year. It would have been awesome.
Your bracelets look great all put together. The colors in the “Under the Sea” are fabulous. And I really love the little bottle that you created.
They are gorgeous!! I still need to get mine together! LOL
I still think, too, that they would look awesome with some lacy ribbon tied on and made into a necklace!
Great shots!
Really beautiful!!! Just amazing work by everyone. 😀
Amazing and gorgeous!!!!
These are both beautiful! I want a charm bracelet!
Absolutely COOL. Do they weigh a ton?
Wow, Erin, this is amazing! Look at all those gorgeous charms! I would almost hate to wear them all at the same time because you can't quite see all their individual beauty. They all look fabulous! Great job, sweetie!!
Awesome Erin! I loved the entire charm swapping that you did and all the adorable Faeries that helped out this year. I'm absolutely in LOVE with my charms and couldn't be happier. You really went all out in teaching us FABULOUSLY and I'm ever so thankful and grateful to of gotten both pieces of CU treasures thanks to you and the swapper crafters. HUGS <3
That little bottle of sand charm is soooo cute! Tnx for the idea! I have MANY mini bottles and i don't really know what to do with them… 🙂